Thursday, December 20, 2012

Mississippi Mud Cupcakes with Marshmallow Frosting


December is a crazy month when it comes to baking. I was super excited about this months Cake Slice Bakers selection. We have a annual Christmas parade every year, and I bake lots of goodies for my family and friends that go to the parade. These were going to be perfect! That is until we got the news a few days before that the parade was cancelled due to the weather! My kids and I were super disappointed! The parade is something we look forward to every year, time to spend with the family and friends. You figure the city would reschedule the event for the following weekend, but it wasn't. Which makes me even more upset just to think about all the kids, and families that look forward to this every year, and its not to say all the effort and money that is spent on the floats people enter. I wonder if the city even took that in consideration when they cancelled! Sorry, I can't get over it. Families have made it a tradition to attend this parade and I was one of them. I really hope next year the weather cooperates, and the event doesn't get cancelled.


I still got to share my cupcakes though. I made them this past weekend and picked up my nephews and nieces, took them to a Christmas concert at my church, and afterwards we had dinner and dessert at my house.We had a nice time. Love those kids!


The recipe I thought was really easy to put together. I didn't even need my stand mixer.


I really liked the recipe, it wasn't super rich like your traditional Mississippi Mud Cake. I have made it once, and loved it, even though it was super rich. I did think the frosting was lacking something, maybe a drizzle of ganache would of made these perfect!


If I ever do make these again, I will skip the frosting recipe and do a traditional butter cream with marshmallow fluff. That should be delish!

Tuesday, November 20, 2012

Shoo-Fly Cake


It's that time if year again when we get to bake from a new book! This years winner was "Vintage Cakes" by Julie Richardson.


Our first selection was "Shoo-Fly Cake"! Never made one before, or heard if it. I honestly didn't think my family was going to like this one. Was I ever wrong! We all had a slice while its was warm, I honestly didn't think it was anything special. But the next day for some reason it tasted delicious! Sometimes for some reason some cakes are just better the next day. I guess just letting the cake rest and completely cool lets the flavors fully develop. The cake was gone the next morning my kids devoured it! I'm glad I really enjoyed the cake myself.

Saturday, October 20, 2012

Basic White Cake


This months cake selection was entirely up to me! I had planned to do the Coconut cake with the custard butter cream, but things got a little stressful for me this week. I had to choose another cake to go with the ingredients I already had in my pantry. A little disappointed about having to choose another cake.
So basically this recipe is a basic white cake that pairs well with any filling. I liked the flavor and texture of the cake, I think adding almond extract would bring it to the next level. I used a whipped topping with a peanut butter chocolate Ganache drizzle. The cake tastes pretty much like box cake mix. Just a slight dryer, I might try adding some oil to the batter to make it a little more moist.
This was also our last recipe from "The Cake Book". Next month we start baking from a new book. Visit my blog next month for the reveal of our new book and first recipe.


Thursday, September 20, 2012

Chocolate Peanut Butter Mousse Cake


 This months Cake Slice selection was this yummy mousse cake. Loved everything about it! Perfect balance of peanut butter and chocolate. This definitely was a winner in my kitchen. This recipe is definitely a keeper. Loved it!


Sunday, August 26, 2012

Polvorones II


You may have read in one of my recent post about my quest to find the perfect Polvoron recipe. My friend Leslie from "La Cocina de Leslie" made these yummy looking Polvorones this week. They were so pretty they inspired me to get back in the kitchen and play with my recipe once again. I did intend to use Leslie's recipe but unfortunately I didn't have any butter.
I made only two changes to my recipe. I used granulated sugar instead of powdered, and I left the pink coloring out. These cookies came out delicious. Very light and crisp. This recipe definitely wins over my previous one.

Polvorones

1 c. shortening
1c. granulated sugar
1/2 c. corn starch
2 c. flour
1 tsp. vanilla extract
1/2 tsp. salt
Sprinkles

Directions:
In a medium mixing bowl mix flour, corn starch, and salt and set aside. Beat shortening and vanilla in stand mixer until creamy. Add sugar, beat until light and fluffy about 2 minutes. Add flour mixture and mix until dough forms. Using a tablespoon spoon out the dough and shape into balls. Place balls of dough on cookie sheet  leaving 3 inches in between each one and lightly  cover with plastic wrap, using the bottom of a glass press down on the cookie to shape.Remove plastic wrap and repeat with each ball. Sprinkle with sprinkles and press them down lightly. Bake in a preheated oven at 350 degrees for 15 minutes. Remove and cool for 10 minutes. Remove the cookies  from cookie sheet and place on cooling rack to cool completely.

Yields 2 dozen cookies

Wednesday, August 8, 2012

Polvorones


I'm on a quest to find my favorite Polvoron cookie recipe like the ones found in your local Mexican bakery (pictured above). I   have not found a soul willing to part with the recipe. I've searched the internet and YouTube and have had no luck. What is the secret to this cookie? I have found other Mexican sweet bread recipes including a "Concha" recipe that turned out awesome. Why aren't people willing to share the Polvoron recipe. I have found a few recipes on line that I have played with and haven't come up close to what I'm looking for. The cookie in the above picture has a slight chewy but yet very crisp texture to it, plus this gorgeous crackling through out the cookie, exactly what I'm looking for.
I decided to go ahead and play with recipe again after searching more recipes on the web last night and came up with this one (pictured below). They turned out very crisp, more than I wanted them to, and didn't have the slight chewy texture I was looking for. They did crack around the edges, but not through out the cookie. The flavor was good, but missing something. So far its the best batch I've made. I will continue to tweak the recipe until I get the result I'm looking for.


Polvorones

1 c. shortening
1 c. powdered sugar
1/2 c. corn starch
2 c. flour
1/2 tsp. salt
1 tsp. vanilla
Pink food coloring

1/2  c. granulated sugar for dusting.

Cream the shortening, add the vanilla and couple of drops of food coloring, mix until combined. Add the rest of the ingredients and mix until soft dough is formed. Using a icecream scoop, scoop out dough and form into a ball. Place on cookie sheet lined with baking paper and flatten with plam of hand until flattened. This will create the cracks around the edges. Bake at 350 degrees for 15 to 18 minutes. Remove and cool 10 minutes, then dust them with granulated sugar.


Saturday, July 21, 2012

White Chocolate Espresso Icebox Cake


I  made my first icebox cake years ago a healthy light version of strawberry cheesecake, it turned out okay. I never had the desire to try another one. 
This months "Cake Slice" bakers selection was a icebox cake. Not to excited about it. I almost got lazy and didn't make it, but I had heavy cream and white chocolate I had to use up, I'm glad I did. This cake really turned out yummy! Loved everything about it! I did use Kahlua instead of the called for liqueur .I must say that this cake really does taste like a ice cream sandwich, but better, with just the right hint of coffee. Loved it!


Sunday, June 24, 2012

Brooklyn Blackout Cake


My husband decided to go fishing yesterday after I came home from work. He took our 11 yr. old son with him, thank goodness! Lately my son seems to whine about everything, being the only boy, I think he feels defeated by his sisters.  After sitting in front of the computer for an hour I started to get a little bored, and decided to take the opportunity to catch up on my "Cake Slice" baking, I can't really relax when my son and my husband are home, too much traffic coming in and out of the kitchen. 
I started on my Blackout Cake first then realized I had everything for the Cinnamon Swirl pound cake, and the Meringue Cups! So off I went into deep concentration! Baking is definitely the therapy I need every so often!
Loved how this cake turned out, the pudding was delicious and really simple to make. The frosting was heaven, I think the next time around I might add cream cheese to the frosting just to cut back the sweetness a little, other wise perfect!


Saturday, June 23, 2012

Individual Meringue Cups with Lime Cream and Fresh Berries


May's "Cake Slice Baker's" selection were these delightful cream filled meringue cups! Definately a light and refreshing dessert. I'm glad I decided to give these a shot!

Cinnamon Swirl Buttermilk Pound Cake


 I would like to apologize for being absent the last two months. I was busy with party planning  for my daughters "Quinceanera". April was definately a little crazy for me, enough that I needed to take May off from baking as well. Glad its over, and that it will be 9  years before I start planning for another one.

April's "Cake Slice Bakers" selection was this awesome pound cake! I'm not to crazy over pound cake, but this one is absolutely delish! The only ingredient I left out was the orange zest, I was a little worried about adding the cardamon, I'm glad I did! I was planning on having waffles for tomorrows Sunday breakfast, but changed my mind, this cake will go way better with my coffee. 


Tuesday, March 20, 2012

Individual Warm Chocolate Cakes


 This months Cake Slice bakers selection were these warm chocolate cakes also known as Lava cakes. I'm really glad this was the winning vote. This was my first flourless cake for me. I used a cupcake pan for these instead, I didn't have the individual baking cups, and quite honest I didn't have the time to go on the hunt for them. I had no problem what so ever baking them in this pan, they released perfectly. I loved the this recipe even though I over baked them, and didn't get the chocolate flow result. They were still super moist and delicious. My husband didn't care for these as much, and my kids were in heaven! I do agree with my husband they are a chocolate-sugar explosion! One was enough for me!


Super moist! Loved them!

I will try too post the recipe soon.


Monday, February 20, 2012

Boston Cream Pie


This months Cake Slice Bakers selection was "Boston Cream Pie" from "The Cake Book" by Tish Boyle. This was my first time making Boston Cream Pie. I really liked the cake especially the thick layer of ganache. This cake reminded me of a "Hostess" chocolate donut, I think it was the chocolate and the texture of the cake. I loved the custard filling which I tweaked a little by adding an extra cup of heavy cream. I would say this cake was almost perfect with the exception of the cake just being a little dry. Overall a simple cake, not to many steps involved and a yummy result.
 I didn't have a chance to post the recipe this month  luckily my good friend Monica from "Lick the Bowl Good" saved the day by offering the simplified recipe for us to share.  I'm really busy planning my daughters 15th birthday. I'm guessing I will participate in March but just might have to skip April's, her birthday is that month and that might be pushing it a little trying to fit that in to my schedule. I'm planning to be fully on board by May.

Boston Cream Pie adapted from The Cake Book

1 recipe Vanilla Custard Filling (make and chill prior to baking the cake)

1 recipe Hot Milk Sponge Cake

1 recipe Chocolate Glaze


For The Vanilla Custard Filling:

3 large egg yolks

1/4 cup granulated sugar

2 Tablespoons cornstarch

1 cup whole milk

1 Tablespoon unsalted butter

1 teaspoon vanilla extract

1/4 cup heavy cream

In a medium bowl, whisk together the yolks, sugar and the cornstarch, set aside.

In a medium saucepan, bring the milk to a gentle boil. Remove the pan from the heat and whisk about 1/3 cup of the hot milk into the yolk mixture. Return the entire mixture to the saucepan, place over medium-high heat, and bring to a boil, whisking constantly, for 1 minute. Remove the pan from the heat, scrape the bottom of the pan with a spatula, and whisk until smooth. Whisk in the butter until melted.

Immediately strain the custard through a fine-mesh sieve into a medium bowl. Whisk in the vanilla extract. Cover the surface of the custard with plastic wrap, and let cool to room temperature, then refrigerate for two hours, or until well chilled.

Just before assembling the cake, transfer the custard filling to the bowl of an electric mixer. Add 1/4 cup heavy cream and using the whisk attachment, beat the mixture at high speed until it is light and forms soft peaks, about 1 minute.


For The Hot Milk Sponge Cake:

1 1/2 cups sifted cake flour

1 1/4 teaspoons baking powder

1/4 teaspoon salt

1/2 cup whole milk

4 Tablespoons unsalted butter, cut into tablespoons

3 large eggs, at room temperature

3/4 cup granulated sugar

1 teaspoon vanilla extract

Position a rack in the center on the oven and preheat the oven to 350 degrees F. Grease the bottom and sides of a 9-inch cake pan. Dust pan with flour.
Sift together the cake flour, baking powder, and salt two times. Set aside.

In a small saucepan, combine the milk and butter and heat over medium heat just until the butter is melted. Remove the pan from the heat and set aside.

In a bowl of an electric mixer, using the whisk attachment, beat the eggs at high speed until blended, about 1 minute. Gradually add the sugar and vanilla extract and beat until pale and tripled in volume, about 6 minutes.

Sift one-third of the flour mixture over the egg mixture and gently fold it in with a rubber spatula. Repeat with the remaining flour mixture in two more additions.

Reheat the milk mixture to just under a boil. Add it all at once to the egg mixture and gently fold it in. Scrape the batter into the prepared pan.

Bake the cake for 20-25 minutes, until it springs back when lightly touched and a cake tester inserted into the center comes out clean. Cool the cake in the pan on a wire rack for 10 minutes.

Run a paring knife around the edge of the pan and invert the cake onto the wire rack. Reinvert the cake, so that it is right side up.


For The Chocolate Glaze:

3 ounces semi-sweet or bittersweet chocolate, finely chopped

1/2 cup heavy cream

1/2 teaspoon vanilla extract

In a small saucepan, bring the cream to a boil. Remove from the heat and add the chocolate to the pan. Stir until the chocolate is completely melted and the glaze is smooth. Stir in the vanilla extract. Transfer the glaze to a small bowl. Cover the surface of the glaze with a piece of plastic wrap and let cool for about 10 minutes before using.

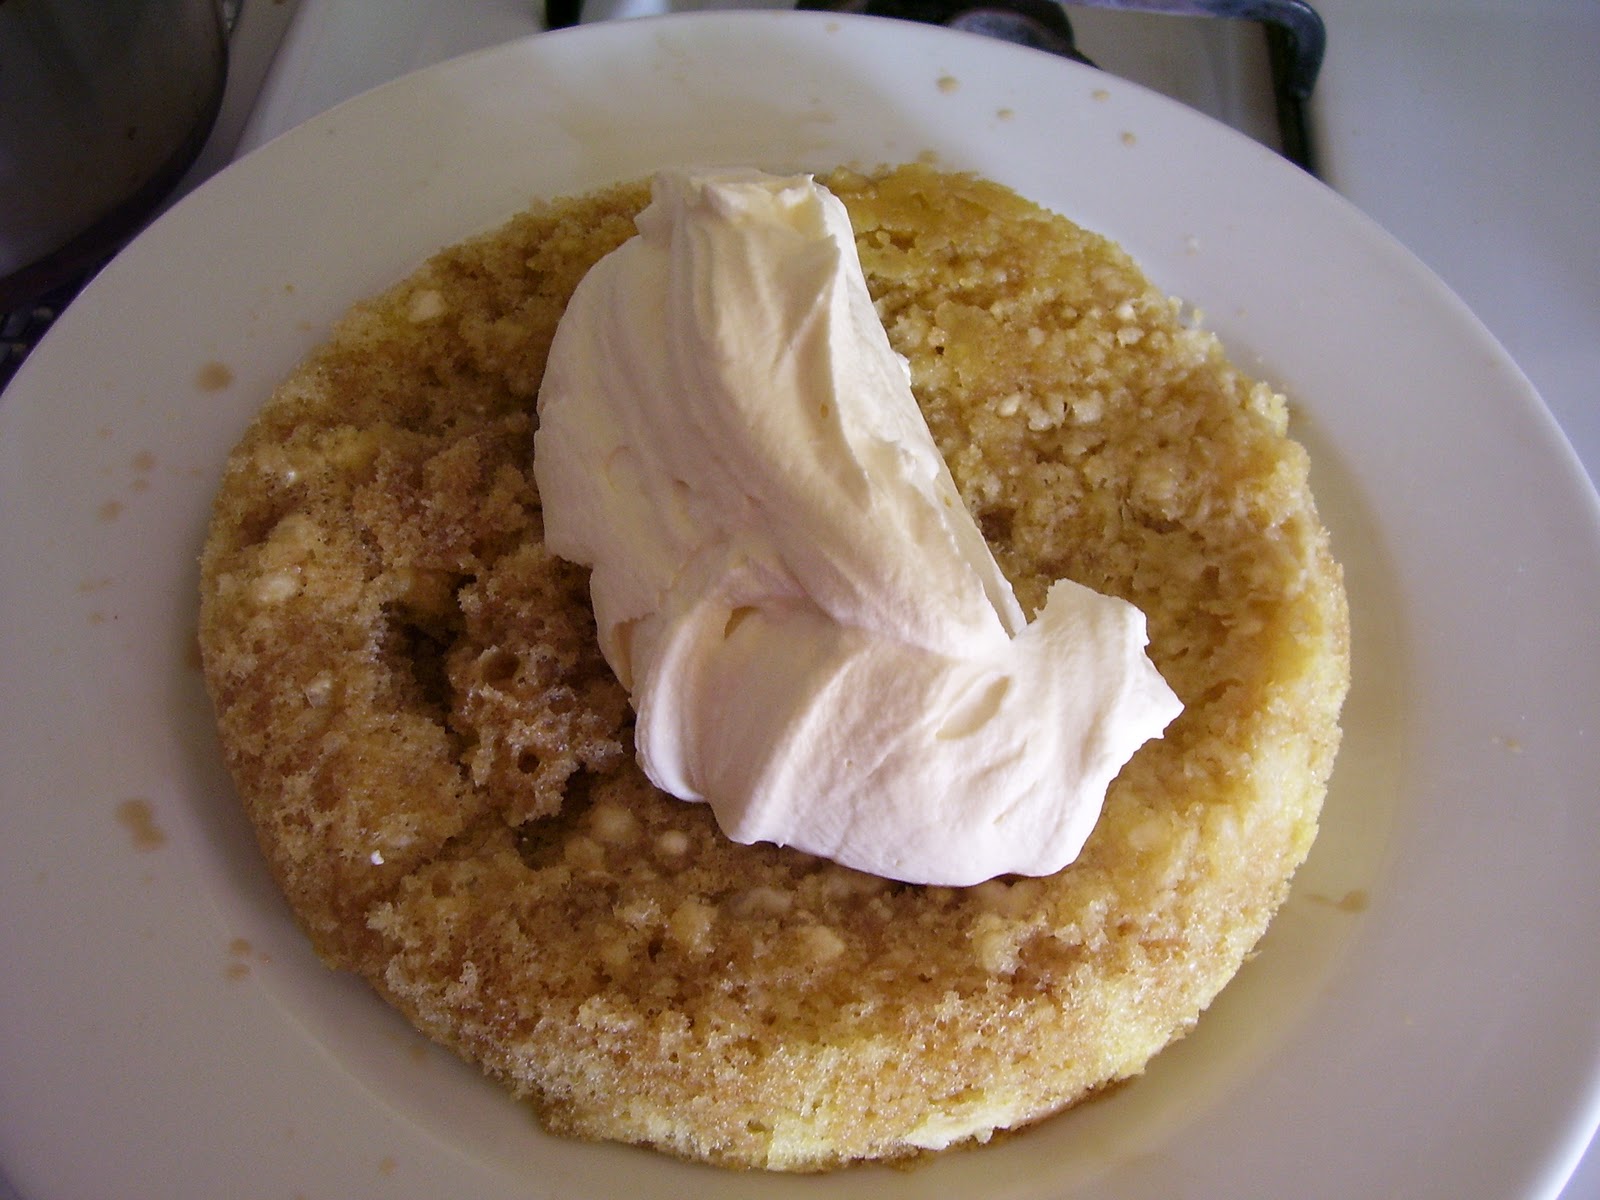
Assemble The Cake: Using a long serrated knife, cut the cake horizontally in half to make 2 layers.

Save the smooth bottom layer for the top of the cake, and place the remaining cake layer cut side up on a serving plate. Scrape the filling onto the layer and, using a small offset metal spatula, spread it into an even layer. Top with the other cake layer, cut side down.

Glaze The Cake: Pour the warm glaze over the top of the cake, allowing some of it to drizzle down the sides. Serve the cake immediately, or refrigerate.

Store in the refrigerator in a covered container for up to a day. Bring to room temperature before serving.


Friday, January 27, 2012

Sticky Buns

 I came  across sticky buns earlier this week while browsing a blog. They looked really good. I didn't have all the ingredients for that particular recipe, so I used my cinammon roll recipe for the dough, and I used a topping recipe I found on Oprah.com. They turned out pretty darn good for being my first attempt.

Sticky Buns
Sweet Dough Recipe click here

Topping
3/4 cup firmly packed light brown sugar
4 Tblsp. unsalted butter
3 Tblsp. honey
1 Tblsp. light corn syrup
1 1/2 coarse chopped pecans (I used walnuts)

Make your dough according to directions, and set aside to rise.


 Combine all your topping ingredients except the nuts, in a sauce pot and heat just until melted, take off heat. Pour your sauce into a 9x13 baking pan and coat the bottom evenly. Sprinkle your nuts over the sauce. Set aside. 
 Take your dough after it has risen properly, and using your hands shape it into a rectangle on top of your floured counter.

 Roll out into a 15x9 rectangle.

 Spread the butter covering the dough, sprinkle the sugar, then the cinammon.

 Roll into a log.

 Cut into 12 slices.

 Place your rolls into your baking pan. Cover and let rise until doubled in size about 1 hour.

 Take your rolls and bake at 350 degrees for 20 minutes.

 Remove your rolls from the oven using oven mitts.

Immediately invert your rolls onto a platter or tray, being carefull not to touch the syrup, its burning hot!

Note: Do not let your rolls cool before you invert them onto a tray, they will stick and not be able to come loose as easily.

Saturday, January 21, 2012

Homemade Kahlua


Homemade Kahlua  was given to me by a co-worker as a Christmas gift many, many years ago. As soon as I went home I tried it, and was pretty impressed! It tasted just like the fancy one you buy in the dark bottle. Then I stored it away, and forgot about.
Then years later I came accross a recipe for Chocolate Kahlua Cake. I searched my pantry for all the ingredients and found my little bottle of Kahlua still there and smelling even more fabulous even after 5 years! I was a little nervous about using it in my recipe, I wasn't sure if I had stored it right, or had no clue if this could even go bad after a certain amount of time. It smelled and looked fine so I decided to go ahead and use it. My cake turned out soooo good! My bottle went back to my pantry and sat there another five years before I had use for it again. And again it came out of my pantry and into my Chocolate Kahlua cake! This stuff never goes bad! 
Then last year I came across a Kahlua recipe. I went out and purchased all the ingredients except for the Vodka. I had this jug of Vodka that had been sitting in my pantry for at least 15 yrs. I have no clue where my husband got it from, it just ended up in my pantry. I couldn't find dark bottling bottles at the dollar store, so I ended up purchasing two pre-filled bottles of dark wine instead and poured the wine down the sink. Don't worry this stuff was pretty cheap, also from the dollar store. I set the corks aside and rinsed the empty bottles with a bit of Vodka just to get all the flavor and color of the wine out of the bottles.
I made my recipe cooled it and bottled it. Then made myself a drink using the Kahlua, heavy cream, milk and ice! Result? Delicious! Just like the store bought! But more affordable!
I plan on making these for gifts next Christmas if I can find the right bottling bottles. I still have my bottle my friend gave me as a gift 11 years ago, and I think of her each time I see it, and I remember all the laughs and good times we had when we worked together. I miss her and the old work crew. We had some pretty good times.


Homemade Kahlua
4 cups water
4 cups sugar
1/2 cup instant coffee crystals
1/4 c. vanilla extract ( I use the Costco brand, which I love, and is very affordable.)
26 ounces Vodka

3 26 oz. bottling bottles

Step 1. Bring water and sugar to a boil.
Step 2. Add to coffee crystals just enough water to dissolve them.
Step 3. Add coffee to water and sugar and boil for 5 minutes, being careful not to let it boil over.
Step 4. Cool completely, then add vanilla and Vodka.
Step 5. Mix well.
Step 6. Pour into your sterilized bottles and seal well with corks.

Note: Sterilize your bottles before use.

Friday, January 20, 2012

Tiramisu Cake

 This months Cake Slice Bakers selection is Tiramisu Cake from The Cake Book by Tish Boyle. This cake almost didn't happen this month. I made Tiramisu for the first time last week from the book "Cake Boss". My intention was to make only that recipe and make it my Cake Slice cake for the month. But then I fell in love with Tiramisu, and couldn't help myself from trying this recipe. I did follow the cake recipe, but decided to make the mascarpone filling the "Cake Boss" way. After researching this recipe in the past I don't ever recall anybody cooking the egg yolk mixture or adding gelatin. To me it just didn't seem right. So I skipped all this and did the tradional mascarpone filling. I also added coffee liqueur to the syrup and increased the amount of sugar, and swaped out the rum in the mascarpone filling for sweet marsala. I loved the turnout of the cake! It was tender and buttery, and soaked up all the syrup just lovely! This cake definatly moved up to the number one spot on my cake list!

Tiramisu Cake

CLASSIC GENOISE 
1 c. sifted cake flour
1/2 tsp. salt
6 large eggs
3/4 c. granulated sugar
1/2 tsp. finely grated lemon zest (I left this out)
1 1/2 tsp. vanilla extract
6 tblsp. unsalted butter, melted and cooled

 Position a rack in the center of the oven and preheat the oven to 350 degrees. Grease the bottom and sides of  two 9" round cake pans. Dust the pans with flour.

 Sift together the flour and salt into a medium bowl. Whisk to combine, and set aside.

 In a heat proof bowl place your eggs and sugar.

 Whisk until sugar dissolved.

 Set the bowl over a sauce pan of simmering water, making sure that the bottom of the bowl does not touch the water, and heat the mixture, whisking constantly, until the eggs are warm.

 Transfer the mixture into your mixing bowl and using the whisk attachment, beat on high speed until the mixture has tripled in volume, about 8 minutes.

 Reduce to low speed and beat in the vanilla extract.

 Sift 1/3 of the flour mixture over the batter and gently fold it in with a rubber spatula. Sift in the reamining flour mixture in two more additions, again folding in gently. Transfer the melted butter to a small bowl if neccesary, and scoop about 3/4 cup of the batter into the bowl. Stir until blended. Fold this mixture into the remaining batter. Scrape the batter into the prepared pans.

 Bake the cakes for 12 to 15 minutes, until the tops spring back when lightly touched and a cake tester inserted into the center comes out clean.

 Cool the cakes in the pan on a wire rack for 15 minutes. Invert the cakes onto the wire rack and cool completely.

ESPRESSO SYRUP 
1 c. brewed espresso
1/2 c. granulated sugar
1/4 c. coffee liqueur

Directions: Bring all ingredients to a simmer until sugar dissolved about 3 to 4 minutes. Remove from heat and let the syrup cool.

MASCARPONE FILLING
4 extra-large egg yolks
1 pound mascarpone cheese
2 tblsp. sweet marsala
1 tblsp. coffe liqueur
1/2 c. granulated sugar
1 c. heavy cream


In a mixing bowl using a whip attachment whip the egg yolks, sugar, mascarpone cheese, sweet marsala, and coffee liqueur until light and airy about 7 minutes.

In  a seperate bowl whip the heavy cream until soft peaks form and fold into mascarpone mixture until combined.


Place one of the cake layers onto a plate and brush with the espresso syrup, about 1/3 cup.


Place 1/3 of the mixture on top of the cake layer and spread evenly.


                                                     Place the second layer on top.


Repeat the steps with the espresso syrup and mascarpone cheese.


Frost the cake with the remaining mascarpone cheese.


Dust the top of the cake with cocoa powder


Refrigerate for at least 4 hours. Slice and serve.